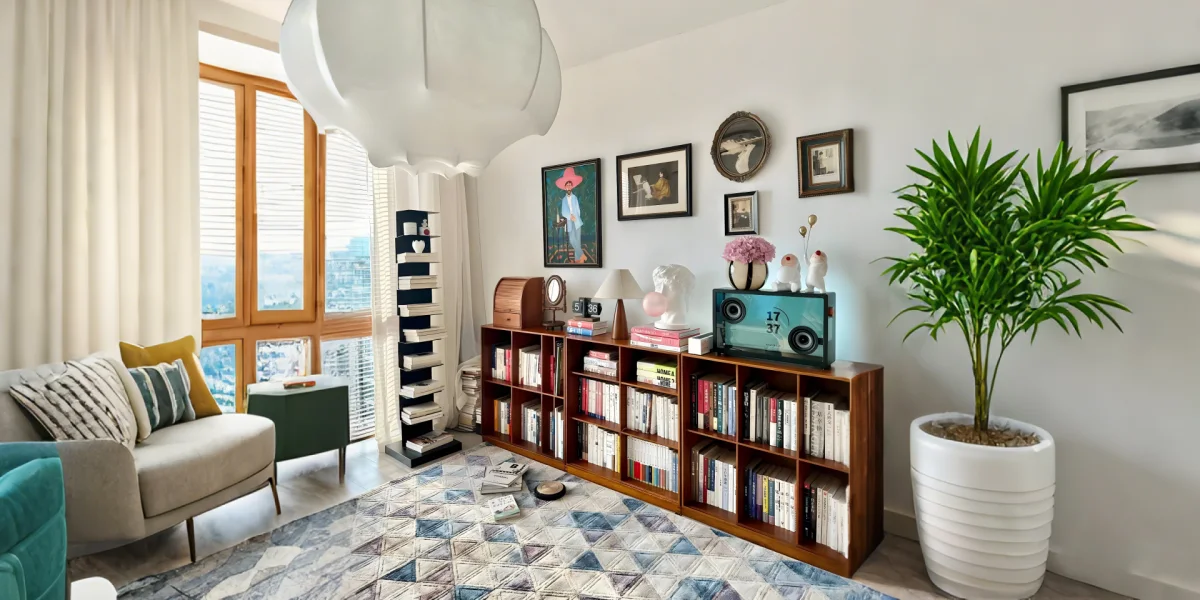
Your bookshelf is more than just a place to store books—it can be a statement of your style, an artistic expression, and a source of inspiration. Instead of simply stacking books, why not turn it into a visual storytelling space? DIY handmade products offer a way to curate and design a bookshelf that speaks to your unique aesthetic while providing the satisfaction of hands-on creativity. This article will guide you through a step-by-step process to decorate your bookshelf using DIY miniature art pieces, literary-themed collectibles, and other handmade decor.
Overall DIY Bookshelf Decoration Process
Transforming your bookshelf into a piece of art involves several key phases:
- Inspiration and Planning: Define your aesthetic goals and gather ideas from design blogs, expert websites, and social media.
- Materials and Tools Selection: Choose DIY projects that align with your vision—whether it’s a Book Nook shelf insert, a 3D Wooden Puzzle, miniature crafts, or traditional Chinese architectural models.
- Step-by-Step Assembly: Follow detailed instructions to build and customize each piece, adding personal touches that reflect your style.
- Final Arrangement and Display: Organize your creations on your bookshelf to create a cohesive narrative and balanced design.
- Sharing and Enjoyment: Celebrate your accomplishment by sharing your work with family, friends, or the online DIY community.
Step 1: Inspiration and Planning – Start With Your Bookshelf Decor Vision
Decorating your bookshelf is not just about placing objects—it’s about curating a space that tells a story and reflects your personality, much like how interior spaces have historically been shaped as both functional settings and deeply personal refuges. Drawing on perspectives from art, literature, philosophy, and psychology, the act of arranging a bookshelf becomes a reflection of interiority—transforming it from a simple storage solution into a meaningful expression of self. This process begins with gathering inspiration and defining a theme that aligns with your vision, allowing your bookshelf to serve as both a study space and a sanctuary of personal identity.
Gathering Creative Ideas
Start your journey by exploring various design platforms for inspiration. Websites like The Spruce offer a wealth of ideas on creative bookshelf décor and DIY projects. Their expert articles provide valuable guidance on integrating different art forms into your home design. Consider browsing through social media platforms like Pinterest and Instagram for more personalized and creative bookshelf styling ideas.
Define Your Bookshelf Theme
Before you begin decorating, decide on a theme that aligns with your interests and interior decor.
Popular Bookshelf Decor Themes:
Fantasy & Literature – Think DIY Book Nooks that recreate iconic scenes.
Architectural Beauty – Featuring Chinese mortise and tenon miniature buildings.
Industrial & Mechanical – Showcasing complex 3D wooden puzzles.
Nostalgia & Whimsy – Dollhouse-style miniatures and handcrafted vignettes.
Visualizing Your Concept
Once you’ve chosen a theme, consider the balance of colors, shapes, and textures to ensure that each DIY element harmonizes with the overall look. Sketching your ideas or compiling reference images will help you bring your vision to life.
By carefully selecting a theme and planning your approach, your bookshelf will become more than just storage—it will be an artistic expression of your passions and creativity.
By carefully selecting a theme and planning your approach, your bookshelf will become more than just storage—it will be an artistic expression of your passions and creativity.
Step 2: Choosing DIY Materials for Your Bookshelf Decor Project
For a meaningful and engaging experience, select DIY products that resonate with your chosen theme.
Once you have a theme, select products that bring it to life. Some excellent options include:
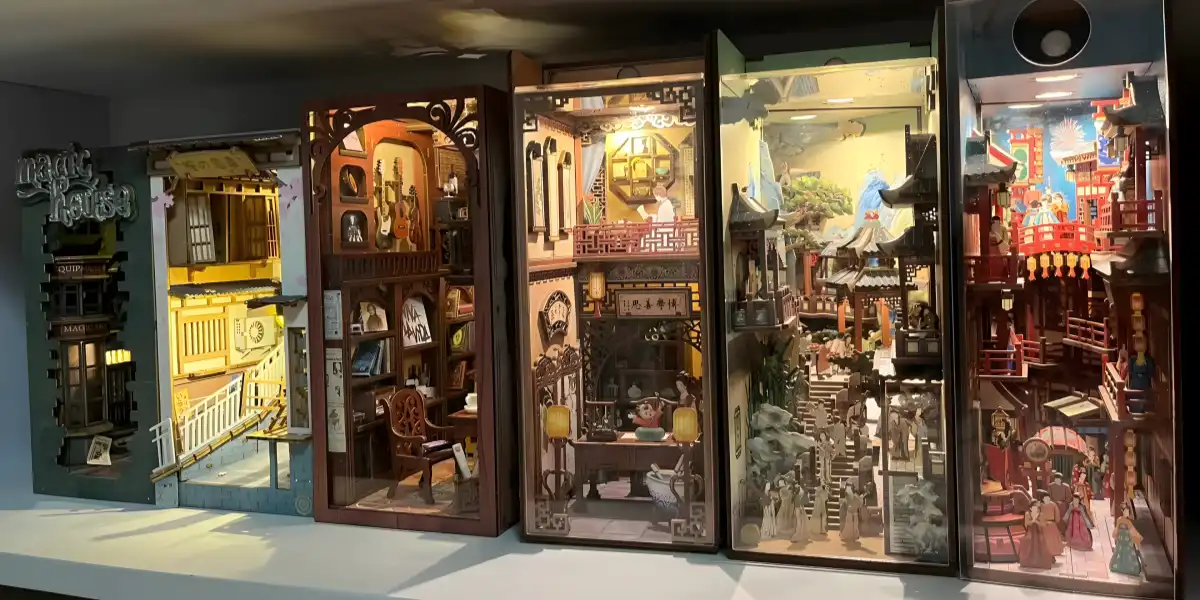
DIY Book Nook Kits – Literary dioramas that fit between books (View Book Nooks Collection)
3D Wooden Puzzles – Mechanical, buildable art pieces (View 3D Wooden Puzzles)
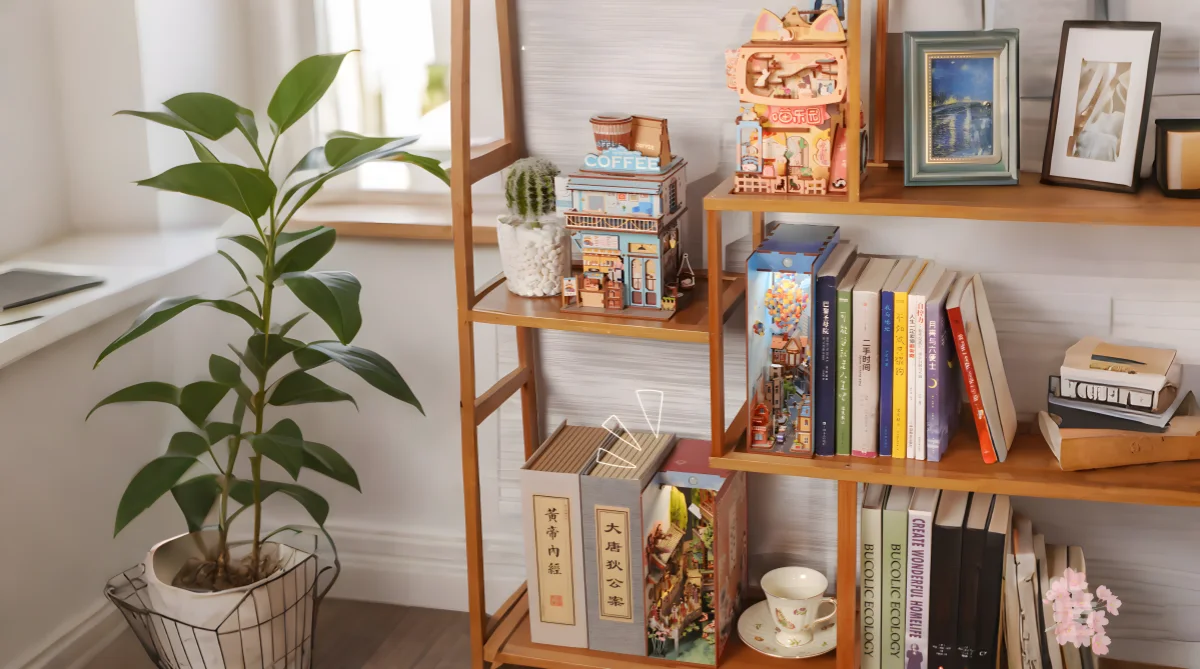
DIY Miniature Crafts – Dollhouse-style sets like cafes or libraries (View DIY Miniatures)
Chinese Mortise & Tenon Architecture – Chinese historical buildings that blend tradition and craftsmanship. Delve into the artistry of traditional Chinese architecture. (Explore Traditional Chinese Architecture Models)
Gathering Essential Tools
Before you begin, ensure you have the necessary tools on hand:
- Cutting tools (scissors, hobby knives)
- Adhesives such as wood glue or craft glue
- Precision tools (small pliers, mini-hammers)
- Optional decorative elements like stickers, paint, and fabric scraps
Following advice from Hometalk, having a well-organized workspace and the right tools is essential for achieving professional-quality results.

Step 3: Assembly & Customization – Create Your Bookshelf Decor Elements
Now comes the most exciting part—assembling and arranging your DIY products. Follow these best practices for a flawless finish:
- Organize Parts: Sort components by size and reference the instruction manual.Follow Assembly Instructions, many DIY kits come with detailed guides to help you build your miniature scenes.
- Use Proper Tools: Tweezers, magnifying glasses, and wood glue are essential for delicate pieces.
- Lighting Integration: Add LED strips (Some booknooks may contain LED lights) to highlight details like stained windows or miniature lamps.
- Create Layers: Position miniatures and figurines in a way that adds depth to your shelf.
- Mix with Personal Memorabilia: Incorporate souvenirs, photos, or handwritten notes for a personalized touch.
Critical Note: Patience is key! For example, assembling some Booknooks maybe involves hundreds of pieces and more than 6 hours of meticulous work.
Step 4: Styling & Display – Tell a Visual Story on Your Shelf
Curate Your Bookshelf Story
Once your DIY projects are complete, it’s time to arrange them into a cohesive narrative that reflects your style. Here are some strategic tips:
- Integrate Booknooks: Place Booknook inserts between related book series to unveil “hidden” scenes that spark curiosity.
- Showcase 3D Puzzles: Use 3D puzzles as standalone centerpieces on open shelves, emphasizing their intricate design and craftsmanship.
- Cluster Miniatures: Group miniature scenes at eye level to maximize visual impact and create engaging focal points.
For example, pair a Gothic-themed Booknook with dark wood bookends and vintage leather-bound books. This thoughtful arrangement not only unifies your décor but also tells a rich, immersive story through your bookshelf.
Want ideas? Browse our Miniature Accessories Collection to elevate your setup.
Step 5: Sharing and Enjoyment – Keep Your Bookshelf Alive
Celebrate your creative journey by sharing your masterpiece with family, friends, or the vibrant online DIY community. Remember, Your beautifully decorated bookshelf is more than just an evolving canvas—it serves as a personal sanctuary, enhancing your sense of life satisfaction and well-being. Thoughtfully designed spaces have been shown to act as environmental mediators, shaping our emotions, and fostering a deeper connection to our surroundings. Here’s how to keep its story fresh:
- Seasonal Transformations: Refresh your display by swapping out decor pieces to mirror the changing seasons or your evolving moods.
- Ongoing Care: Regularly dust and clean both your books and DIY elements to preserve their charm and detail.
- Expand Your Collection: Continue crafting new DIY projects to add layers of narrative and artistic flair, ensuring your bookshelf remains a dynamic expression of your creativity.
By actively maintaining and updating your bookshelf, you not only celebrate your past accomplishments but also invite new inspirations and stories into your personal space.
Reiterating Critical Steps for Success
Throughout your DIY journey, remember these key practices:
- Plan Thoroughly: Your initial sketches and research form the foundation for success.
- Emphasize Precision: Whether assembling a delicate Book Nook or a complex 3D puzzle, precision is crucial.
- Maintain Organization: Keep your workspace tidy with tools easily accessible to foster creativity and efficiency.
- Embrace Personalization: Add personal touches to make your finished project uniquely yours.
Transforming your bookshelf into a dynamic canvas for artistic expression is far more than a simple decoration project—it’s a creative journey where craftsmanship meets literature and personal passion. By carefully integrating DIY projects such as Book Nook shelf inserts, 3D Wooden Puzzles, DIY Miniature Crafts, and Chinese Mortise and Tenon Building Blocks, you create a personalized space that tells your unique story. Backed by expert insights from trusted sources like Hometalk, every step—from gathering inspiration and selecting a theme to meticulously assembling and thoughtfully arranging each element—is an opportunity to learn, grow, and celebrate your creative victories. Your bookshelf then evolves into an immersive visual experience that reflects your artistic and literary passions. Embrace the adventure, enjoy the process, and bring “Big Fun in Small Scenes” to life in your home.
Happy decorating!
Bonus: Bookshelf Decor FAQ
Q: What’s the best way to decorate a bookshelf with DIY items? A: Choose a cohesive theme, integrate DIY pieces with personal items, and use lighting to bring it to life.
Q: Can these decorations work in small spaces? A: Absolutely! Book Nooks and miniatures are compact and designed to fit between books.
Q: How long do DIY kits take to assemble? A: Book Nooks may take 6–10 hours depending on complexity; puzzles 3–5 hours.
📚 Curious about book nook kits? Discover our Ultimate Book Nook Guide to learn how to create magical bookshelf scenes from scratch.
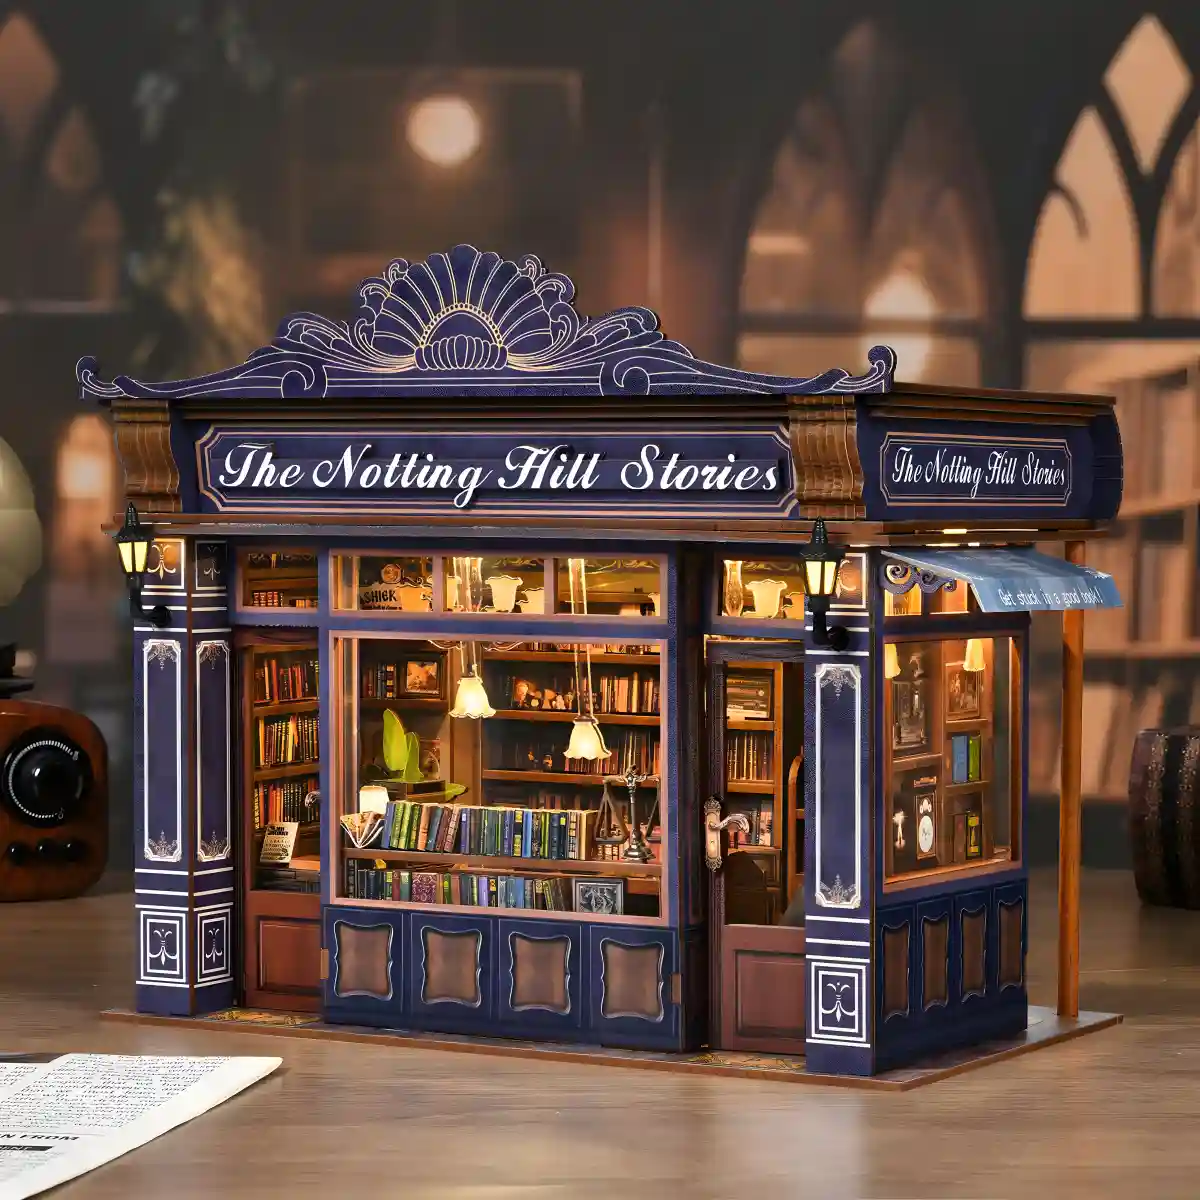
The Notting Hill Stories
Beyond just a craft kit, The Notting Hill Stories is a doorway into a quiet world of imagination. Inspired by a rainy afternoon in London, this DIY miniature house invites you to slow down and build a story, one detail at a time.

The Art of Slow Living: How DIY Book Nooks Create Moments of Stillness
DIY Book Nooks are more than miniature scenes—they’re slow living rituals. This guide explores how mindful crafting, cozy routines, and analog creativity turn tiny worlds into meaningful moments of stillness.